How to Setup a New AGE Computer
Preface
First things first, Microsoft loves to change the Windows first run process so these instructions may not be exactly inline with your experience. Nevertheless, do your best and push forward. The key is to get the device enrolled using your account. Once there, any configuration changes necessary can be pushed to it.
To setup a brand-new AGE Windows 10/11 Device
In an effort to keep IT costs down and help make AGE more competitive in the marketplace, we employ an approach to computer deployment that allows for us to drop ship a device to employees directly from the manufacturer, then have the employee go through a brief enrollment process which installs the AGE management profile on the device. This is called Out of Box Experience (OOBE). This saves AGE from having to ship the device to a location to have it imaged then ship it again to the end user. In addition to the cost savings, this allows us to get computers to new hires much quicker, which enables them to begin supporting customers immediately.
Please note that you should only enroll devices purchased and provided by the AGE IT Department. Enrolling a personal device will result in undesired configuration and policy being pushed to your personal device. We do generally block this kind of enrollment but it's best not to try it at all.
Start up the new AGE device and begin your OOBE
Basics
- Turn on the computer and let it boot to the Windows setup screen
- Select your region (most likely United States) and click Yes
- Choose your keyboard layout (again most likely US) and click Yes
- Skip choosing a second keyboard layout (you can always do this later)
- If you haven't connected it already via a cable, connect your device to a wireless network by choosing the appropriate SSID and entering the network security key and clicking Next.
- Wait for the device to connect to Microsoft and download/install any Windows updates. This can take a few minutes.
- Accept the Microsoft license agreement.
Computer Name
- When prompted to create a name select, Skip for Now (If that's not available name it whatever you want and click Next. It will get renamed automatically later)
Account
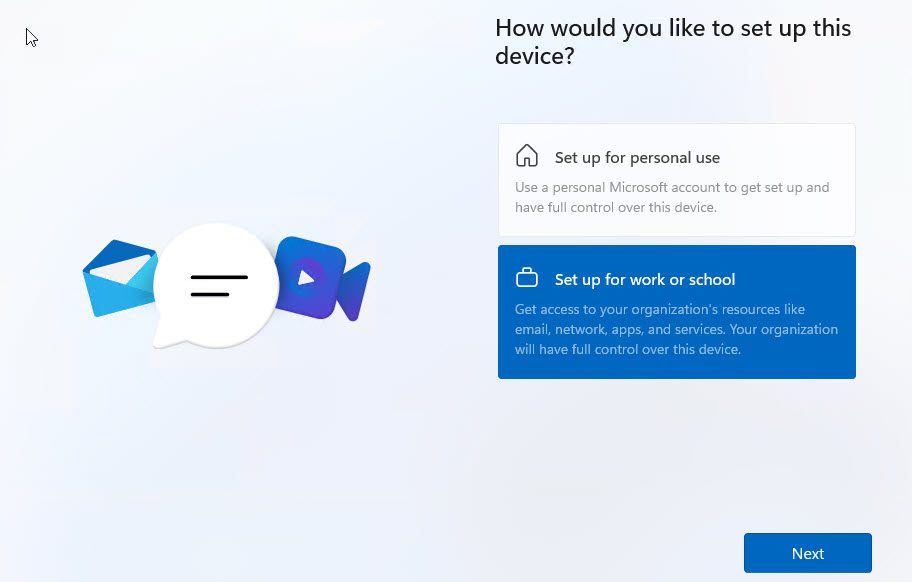
- When presented with this screen choose Set up for work or school and click Next.
- On the Let's set things up for your work or school screen, type your AGE email address (HINT: first.last@age.solutions) and click Next.
- On the next screen, type your AGE password and choose Sign in.
If you have already set up MFA, on your mobile device, approve the MFA request so it can access your account. If you have not already set up MFA, follow the prompts on screen to set up your mobile device for MFA.
- Wait for your device to setup for Work (this can take some time and a few reboots).
- Choose your privacy settings (don't worry about what you choose for privacy, it's an AGE managed device that falls under the AGE Privacy policy). Just click Next.
Sign in again (which will require MFA again) and wait while the standard AGE Software suite will be automatically loaded onto the device.
The Account Setup step can take some time so please be patient. It needs to download the Microsoft Office Suite from Microsoft (among other things) and install it and the speed depends on bandwidth, congestion etc. The timeout is 45 minutes after which the computer will ask if you want to Try again or Continue anyway. If you encounter this please try again a few times before choosing continue anyway. We can still move forward with continue anyway but it's cleaner if it completes the process.Eventually your computer will restart and you will be prompted to login and setup Windows Hello and a PIN. It is recommended you use a biometric option i.e. face recognition or fingerprint but you can also choose to only use a PIN.
- After setting up Windows Hello, you will be taken to your desktop and you may start using it however, your computer is not done applying policy and installing software. It will take up to an hour to complete. Feel free to use it. Give it at least an hour before getting concerned about any missing software. Go ahead and delete any Desktop Shortcuts that you don't want (some of the applications force themselves onto the desktop unfortunately).
- Restart your computer when you get a chance. When you finally see the AGE desktop wallpaper, you will know that your device is now fully enrolled in AGE and protected!
Regarding Additional Software...
Additional AGE Approved software can be installed from the Company Portal application which will be installed on your computer as part of the enrollment process. Please review the knowledge article on installing software.
IMPORTANT NOTE: Per DoD requirements, you are restricted from installing software on your computer unless it is installed from the AGE Company Portal. If you require software, please make a request via the Support Center. Please bear with us while we build our software repository.
Related Articles
How to work with multiple Microsoft 365 Identities Using Browser Profiles
Introducing Microsoft 365 Identities The Microsoft 365 (M365), and Azure, ecosystem relies on an identity solution called Entra ID, formerly known as Azure Active Directory. These identities are leveraged by users to access Microsoft 365 services, ...Enroll Android device in BYOD
Introduction AGE supports the use of personal mobile devices (Android and iOS based only) for accessing AGE resources. Personal mobile devices must be enrolled in AGE mobile device management in order to use mobile applications to access AGE ...Enroll Apple iOS device in BYOD
Introduction As part of our Bring Your Own Device (BYOD) program, AGE supports the use of personal mobile devices (Android and iOS based only) for accessing AGE resources. Personal mobile devices must be enrolled in AGE mobile device management in ...How to Access Azure Virtual Desktop (AVD) / Remote Desktop
Preface AGE leverages Azure Virtual Desktop (AVD) for a number of use cases including consultant access, developer access, and student training. As the name implies, AVD relies on Microsoft Azure, which means you'll need to leverage your Entra ID ...How do I find my PIV ID?
Background The U.S. Federal government leverages Personal Identity Verification (PIV) identity cards for its employees and contractors. The Department of Defense (DoD) implements PIV through Common Access Cards (CACs). These cards hold digital ...